
The purge valve is a crucial part of a vehicle’s emissions system. It helps regulate the quantity of fuel vapor that escapes into the atmosphere. Purge valve testing and maintenance should be done regularly to ensure your vehicle operates smoothly and does not eject hazardous emissions. While many drivers find it easy to perform the purge valve test, some don’t. If you’re one of those, here is a step-by-step guide on how to test purge valve with multimeter.
Required Tools
You will need the following tools to test the purge valve:
- Multimeter
- Safety goggles
- Gloves
Identifying the Purge Valve
Next, you’ll need to identify where the purge valve is located in your vehicle. The purge valve can usually be found near the engine or fuel tank. If you’re unsure where to look, consult your owner’s manual or contact a mechanic.
Understanding Multimeters
Once you have located the valve, you should understand how a multimeter works. It is a handy electronic device that measures various electrical properties such as resistance, continuity, and voltage. You must learn to use the device correctly and take safety precautions before testing.
How to Clear the Service Suspension System [Detailed Guide]
Common Problems with Purge Valve
Stuck Closed: The purge valve in your engine may experience various issues, including getting stuck closed or open. When the valve is stuck closed, you may notice the engine misfiring and difficulties starting your vehicle. Fortunately, this problem is easily detectable as the engine light on the car’s dashboard illuminates.
Stuck Open: When the purge valve gets stuck open, it can cause a significant issue since there is no control over the amount of fuel vapor entering the engine. This can lead to engine misfiring and difficulties starting your car. Unfortunately, it can be harder to detect since the vehicle may still be operational.
Power Terminal Problem: In addition to these problems, there may be issues with the power terminals connecting the purge valve to the PCM. When these terminals are faulty, the purge valve may not receive the appropriate communication from the PCM to carry out its duties correctly. You can use a multimeter to run proper tests on this and other car components to diagnose the issue.
Preparation for Purge Valve Test
Before starting the testing, make sure that your vehicle is turned off and in a safe and secure location. Also, make sure that your multimeter is functioning correctly and set to the appropriate setting for the test. Now, you are all set to test the purge valve.
Testing the Purge Valve
The purge valve can be tested throw any of the following methods:
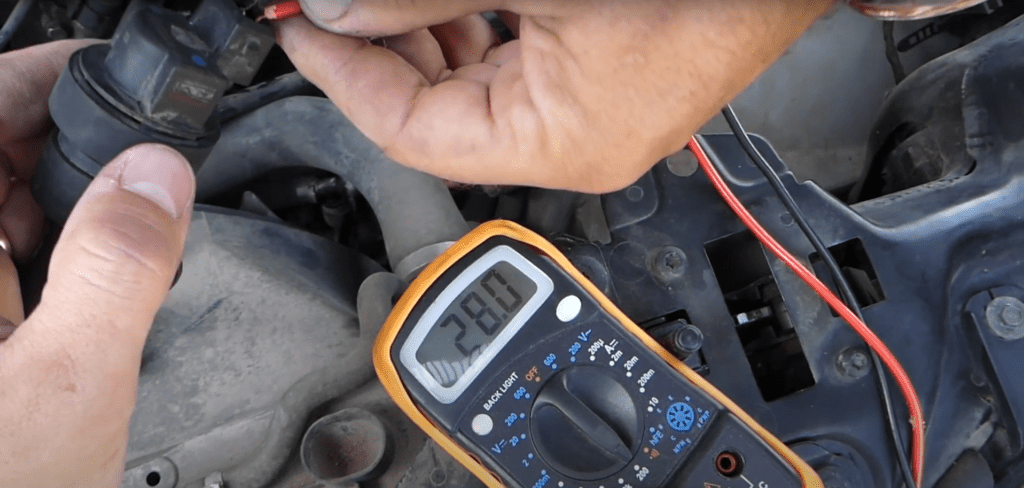
Testing the Resistance of the Purge Valve
To test the resistance of the purge valve, follow these steps:
Disconnect the purge valve from the vehicle’s electrical system: This will prevent any current from flowing through the valve during testing, ensuring accurate resistance readings.
Set the multimeter to Ohms: Ensure that the multimeter is set to the ohm (Ω) scale and is functioning correctly.
Place the multimeter probes on the valve terminals: Touch the multimeter probes to the valve’s electrical terminals, ensuring they make a secure connection.
Record the resistance reading: Observe the multimeter’s display to determine the resistance reading. The reading will vary depending on the valve’s model, but it should be within the acceptable range specified in the manufacturer’s documentation.
Interpret the results: If the resistance reading falls within the acceptable range, you can proceed with further tests to diagnose any other issues with the valve or its electrical connections. However, if the reading is outside the acceptable range, the purge valve is likely faulty and requires replacement.
How to Reset Oil Change on Jeep Wrangler?
Testing the Continuity of the Purge Valve
The continuity of the purge valve can be tested by following these steps:
Disconnect the purge valve from the vehicle’s electrical system: This will prevent any current from flowing through the valve during testing, ensuring accurate continuity readings.
Set the multimeter to measure continuity: Ensure that the multimeter is set to the continuity (beep) mode and is functioning correctly.
Place the multimeter probes on the valve terminals: Touch one multimeter probe to one of the valve’s electrical terminals and the other probe to the remaining terminal, ensuring they make a secure connection.
Observe the multimeter: If the valve has continuity, the multimeter will emit a beep sound. If it does not, there will be no sound.
Interpret the results: Compare the continuity reading with the acceptable range specified in the manufacturer’s documentation. If the continuity reading is within range, the valve is functioning correctly. However, if the reading is outside the acceptable range or there is no continuity, the purge valve is likely faulty and requires replacement.
Mechanical Test
The third and final method to perform the purge valve test is by running some mechanical tests, which include the purge valve click test and the purge valve vacuum test.
1. Purge Valve Click Test
The purge valve click test is conducted to identify a stuck closed problem through the following steps:
Ensure the purge valve is adequately connected: Check that the purge valve is connected to the vehicle’s electrical system and that the engine is turned off
Locate the purge valve: The valve is typically located near the engine and can be identified by its wiring harness.
Remove the valve from the engine: If the valve is not easily accessible, you may need to remove it from the engine for testing.
Connect a power source: Using a jumper wire, connect the purge valve to a power source, such as the car battery.
Listen for the clicking sound: When power is applied to the purge valve, it should emit a clicking sound, indicating that it is opening and closing correctly.
Monitor the vacuum pressure: If you have a vacuum gauge, connect it to the purge valve and monitor the pressure. When the valve opens, the vacuum pressure should drop to zero.
Check for faults: If the valve does not emit a clicking sound, it may not be accurate and require replacement. Additionally, it may not be authentic if the vacuum pressure does not drop when the valve opens.
Can Low Tire Pressure Cause Check Engine Light?
2. Purge Valve Vacuum Test
The Purge Valve Vacuum Test is commonly used to identify a malfunctioning purge valve in an engine that fails to deliver the correct amount of fuel vapor. This issue can lead to a reduction in the engine’s performance.
You will need a handheld vacuum pump and regular tools to perform this test.
Attach vacuum pump: Start by attaching the vacuum pump to the outlet where fuel vapor enters and exits the engine, ensuring the hose length is between 5 and 8 inches for optimal performance.
Monitor vacuum pressure: Turn on the vacuum pump and check the gauge to ensure the pressure is between 20 and 30 Hg. Monitor the vacuum pressure for 2-3 minutes.
Identify the fault: A decrease in vacuum pressure indicates a leak in the purge valve, which needs replacement. If the vacuum pressure remains constant, the valve is not the issue.
Listen for a click sound: If the pressure does not drop, connect the purge valve to a power source, such as your car battery, to trigger it to open. Listen for a clicking sound to confirm that the valve has opened.
The final check: Check if the vacuum pressure has dropped to zero. If it does, it indicates that the purge valve is functioning correctly.
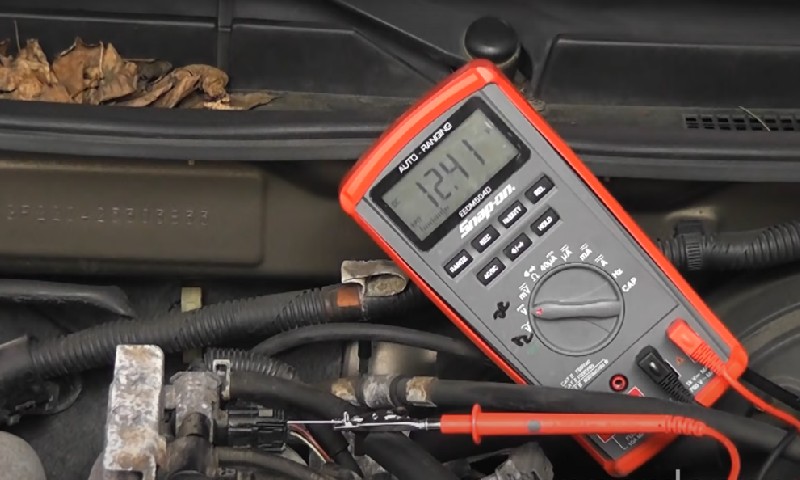
Testing the Voltage of the Purge Valve
To test the voltage of the purge valve, set your multimeter to measure voltage and identify the positive and negative terminals of the valve. Measure the voltage and compare the reading to the manufacturer’s specifications.
Reading Test Results
The resistance, continuity, and voltage readings can indicate whether the purge valve is functioning correctly. If the readings are inconsistent with the manufacturer’s specifications, it may be time to replace or repair the purge valve.
Fixing Purge Valve Problems
DIY fixes for common purge valve problems include checking for vacuum leaks, cleaning or replacing the valve, and repairing wiring issues. If the problem persists, it may be necessary to seek professional help.
How to Bypass a Fuel Rail Pressure Sensor?
Frequently Asked Questions (FAQs)
Sure, here are the answers to these frequently asked questions about purge valves:
How often should I test my purge valve?
Answer: You should test your vehicle’s purge valve at least once a year for routine maintenance. However, if you notice any signs of a malfunctioning purge valve, such as the check engine light coming on or a decrease in fuel efficiency, you should have it tested as soon as possible.
What are the consequences of a malfunctioning purge valve?
Answer: A faulty purge valve can create several problems with your vehicle’s emissions system. It can set off the check engine light, reduce fuel economy, and even cause your car to fail an emissions test. A defective purge valve can also result in more significant emissions and environmental harm.
Can I still drive my vehicle with a faulty purge valve?
Answer: Though it is technically possible to drive with a faulty purge valve, it’s not recommended. Because a malfunctioning purge valve can cause issues with your vehicle’s emissions system and decrease fuel efficiency, which can cost you more in the long run.
How much does it cost to repair or replace a purge valve?
Answer: The cost of repairing or replacing a purge valve can vary depending on the make and model of your vehicle and the severity of the issue. On average, the cost can range from $100 to $400.
Disclaimer: It is essential to seek professional advice when dealing with topics that can affect the safety and well-being of individuals. It is not advisable to rely solely on information found online.
I’ve recommended this article with my colleagues, it’s too good to keep to myself.